Releasing yourself, escaping different dangerous grabs, starting from a sitting position. There are different ways of getting up…

G3 Training Program
Releasing yourself, escaping different dangerous grabs, starting from a sitting position. There are different ways of getting up…
Video transcript
Releasing yourself, escaping different dangerous grabs, starting from a sitting position. There are different ways of getting up. The first one, that we show here, is while bursting forward. Starting from a relaxed and casual sitting on a chair, burst forward in order to meet an opponent in an aggressive manner heads on. Abruptly you should contract abdominal muscles, send your body forward, while sending your legs, your feet, backwards. Plant both your feet behind you and push forward and upwards. The moment you set forward and send your feet backwards, both of the feet planted to the ground, the set of balance is in front of your base, in front of your legs. Pushing forward will create sort of an explosive motion, sort of a burst forward. Like this you can meet the opponent early, you can defend counterattack, or just get up and move in sort of a sprint. While you do this, keep your chin a bit down and your palms, your hands, are already in a ready position to deal with what is coming.
Second way of getting up from a chair is just getting upwards. Meaning, from a casual position, contract abdominal muscles, send one leg backwards to the side, diagonally backwards, and one diagonally forward. Press and get up, sort of a squat or a lunge with one leg forward, one leg backwards. The two legs, like couple of pillars, attacking the center of gravity, your body on them. Your torso is straight, and you come up into a fighting position similar to the general outlet stance.
Third way of getting up is getting up while turning, moving backwards. From a casual sitting position, start with contracting abdominal muscles, lifting the torso a bit, sending one leg slightly diagonally forward and the other one slightly diagonally backwards, while turning it. Turning in the body, in the foot, the knee, all these directed in a pivoting action towards the rear. As you move up, your balance is as such that you are able to advance towards the rear. Keep your hands in a ready position to be able to defend, to attack, to counterattack and to release. Meaning, dealing appropriately with whatever problem you’re facing.
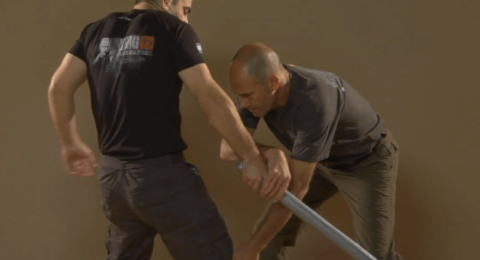
Getting up and retreating to lift and use the chair. In order to be able to use the chair soon and efficiently, you need to get up and stay close to the chair. One leg is directed a bit forward, the other one a bit backwards. Like this you get up efficiently, meaning the whole torso is being sent upwards. As soon as possible, bring one leg between the other and the chair. Particularly, it is a step backwards, Now you are positioned by the side or behind the chair. You can lift it by the seat in the back of it and use it as needed for defenses, for attacks, for preparation, for other action. As you get up, keep eye contact with the opponent. As you move behind the chair, be sure that distance between you and the opponent is kept correctly. Meaning, you must operate in the correct timing, not to let the opponent foil your action and use the chair against you.
Climbing a chair, falling backwards. It may be because of an impact from the front. It can be because of push or a pull, either from the front or behind, you’re falling down. To avoid injuries, contract the abdominal muscles and bring your torso, your body, upwards, lifting the head even more off the ground. Keep your chin towards your chest. Keep your legs in front of you. Keep your hands in a place that they can be used. Sometimes you may need to do a break fall. However, in most cases, because the seat back is protecting your own back it is not need to do a break fall. After you hit the ground, you can kick the chair towards the opponent, creating some sort of disturbance and a barrier towards him.
How to continue from this point? Naturally as needed. You can get up moving away, you can get up in place, you can get up while attacking. Whatever is needed according to the situation and the circumstances. When your balance is being disturbed and you feel that you’re really falling backwards, you must contract the abdominal muscles and the hip flexors, meaning you are doing like a sit up. This sends the chair towards the ground and your body upwards. After the chair hits the ground, naturally your body will continue to lie or to go down towards the ground. Be careful not to make any rolling type of action that will endanger your head. The impact itself with the ground has an effect of a whiplash, meaning your head will be sent towards the ground, so contract your neck muscles, bring your chin towards your chest and avoid any bounce from the recoil of the head towards the ground. As usual, keep eye contact with the opponent. As soon as possible, of course, you can scan the area to see if there are more dangerous people who aim to harm you.
Avoid and deescalate. When it’s possible get up, talk to the person, move away, avoid the confrontation. If that person wanted to sit down, even the chair, do your best to avoid the confrontation. If this possible, excellent, if not, you will need to confront. As previously seen, we get up in the basic manner, keeping hands in a ready position, moving sideways, circling around the opponent, scanning and using the tactical maneuvers that we have done so many times.
Dealing with an aggressive attacker at a distance. Here practically, we notice the aggressive attacker and we respond with preemptive attacks. It is possible to get up and just kick, naturally depend on the distance. Here’s an example that there’s a kick to the opponent while two hands are still holding and supporting the body, while the kick gets its maximum range. This is a regular kick forward, it can be directed to the head, the solar plexus or the groin of the opponent. It can be directed towards the head, the solar plexus, or the groin of the opponent. The base leg and the two hands are practically three points to support the body. The center of gravity, the pelvis, the upper body, all move towards the opponent, meaning enabling a strong kick. After the kick, continue with more counterattacks or move away from the danger zone. If needed, naturally you could also use the chair.
As in the basic timeline, do not let the opponent grab a hold of you. Here’s the example of an inside defense and an early counterattack. Counterattack can be towards the groin, if you’re still seated, towards the lower ribs, towards the head, any reasonable vulnerable point is a good place to attack. After the first attack, the first counteraction, continue as needed with more counterattacks and move away from the danger zone. The defense that is being used here is appropriate to the angle from which the attacker is coming and the direction of his attack. Here, it is an inside defense with the palm. Parallel to the inside defense, you do a body defense. This dynamic defense practically takes your neck area out of the line the advancing attacker, while moving upwards, getting up from the chair and out of the whole channel of the attacker, you’re delivering the series of appropriate counterattacks.
Release from a choke from the front while seated. Here the example is, the technique using one hand release and a simultaneously counterattack with the other hand. As in the standing position, one hand goes and strikes with the hook, meaning the plucking action on the wrist area, as close as possible to the thumb of the opponent. Elbow goes backwards while the body turns. Simultaneously, you are striking with the other hand. The first strike can be to the groin, to the solar plexus, to the head, to the neck of the opponent. This is relatively an aggressive response, as one hand is releasing, or the defending hand, and the other one is in an attacking mode. Naturally, when more in a panic situation, one can do a two hand release, two plucking hands. Depending on where the attacker is standing, between the legs or over one leg, that leg can attack with the kick to the groin. It can be a knee kick, a shin kick, or even a kick with a foot.
Remember the principals of plucking, meaning the hook goes between the two hands, very close to the neck, and from there strikes outward, towards the thumb or the wrist of the opponent. Simultaneously, to enhance this plucking action, the striking action with the hook, body needs to turn to send the elbow as much as backwards as possible. The other hand, the free hand, is striking forward. If the opponent is relatively far away, usually you can strike with a hit towards the neck or the chin. If it’s closer, the strike to the groin may be most appropriate. Don’t forget the body defense, meaning the contraction of the neck area. Tighten these muscles around the neck to make it difficult to the opponent to choke you.
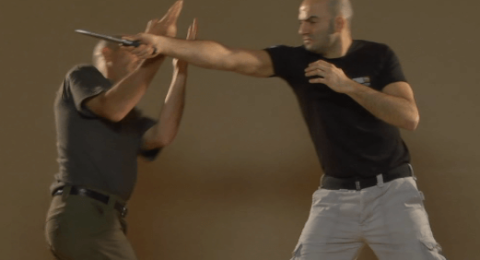
Against a choke from the side, the prevention. Let against a choke from the front doing a hand defense and counterattack is an excellent solution if the attacker has been perceived relatively early. Suitable to the angle from which the attacker is coming and sending his hands from, use the body moving forward and a hand defense, sending his hands backwards, meaning backwards to you. Hand defense and body defense, while getting up forward, away from the opponent, with one leg you made a step, with the other one you can kick. Your body defense takes you out of the channel of the attack of the opponent. Your hand defense, the choppy out with motion, is deflecting the opponent’s hands, preventing them from grabbing you. Counterattack, as you see fit, and continue to move away from the danger zone. Here the example is doing the minimum, meaning one kick and move away. If there’s a necessity for more counterattacks, apply them.
Release from the choke from the side in a seated position. The attacker already garbed you. As in a choke standing, one should release and counterattack. A plucking motion, a hook that is striking the area of the base of the thumb is removing the attacker’s hand off your throat. Simultaneously with the other hand you’re striking and also getting up as soon as you can. First counterattack naturally depends on the initial position of your hand, meaning the hand that is going to strike, the hand close to the opponent. First strike can be towards the groin or towards the lower ribs, or if the opponent is not so close, towards his chin and eyes. Plucking while simultaneously counterattacking. Get up as soon as you can and continue with more counterattacks. During the series of counterattacks you are directing all your resources, meaning legs, hands, towards the opponent. The finishing mode should be moving away from the danger zone, standing, looking, checking the area and going to the next mission that may be self-evacuation or defending other person or equipping yourself with a tool that can be used for additional self-defense actions.
Release from a choke from while in a seated position. As soon as you can, release yourself as fast as possible from the choke that has been applied on your neck. Get up in a turn and counterattack as soon as you can. The body defense, sort of protection, is taking the chin down, contract your neck muscles to prevent from being choked so easily. Simultaneously lift the elbows upwards, two hooks should land below the opponents thumbs. In a fast action, these hooks are scraping or plucking the opponents thumbs. In order to meet the aggressor’s thumbs, be sure that your pinkies are touching each other. Garbing the base of the thumb, the big muscle under the thumb, is much less efficient. Do your best to avoid it. While plucking the opponents thumbs, you position your legs appropriately and start standing and turning. Turn as fast as you can, release the opposite hand to the direction of the turning and strike with it. Holding and pulling strongly the thumb of the opponent may inflict some sort of a leverage on his wrist. By the way, it is possible, of course, to use a wrist leverage in these cases.
Align your body, as soon as possible, to the side of the opponent. From that angle it is most efficient to strike. The aggressor is relatively limited and you’re able to strike efficiently without him managing to defend or to counterattack more. Reaching the side of the opponent and attacking from that direction prevents the attacker from continuing with further attacks. Finishing mode can be moving away danger zone or any other appropriate one.
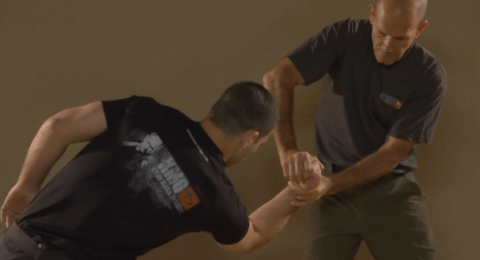
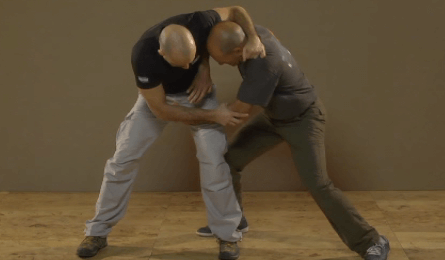
Release from a choke from behind, while applying a wrist-lock on the opponents hand. It may be because of certain type of limitations that you cannot get up so early or counterattack efficiently, you may use to choose a wrist-lock after the release. We have taught this type of release in one of the practitioner levels. After plucking and removing the hands of the opponent off your neck, use the far hand to twist and bend the opponent’s wrist and palm. This actions takes the opponent off balance, inflict some level of pain and gives you the opportunity to get up and counterattack. This technique is also most appropriate in times and places that you cannot get up. The wrist leverage take the opponent off balance and moving to the side. From that point and at that moment, you can counterattack the aggressor more efficiently.
An efficient wrist-lock, as you see here, will disturb the balance of the opponent, will create an opening for appropriate counterattacks, and eventually you can send the opponent to the ground. Finishing mode, as usual, here we demonstrate moving away from a danger zone. The way of getting up from the chair is the way we practice. Meaning, get up while turning. If you move to left, your left foot and left knee are directed towards the direction of the movement.
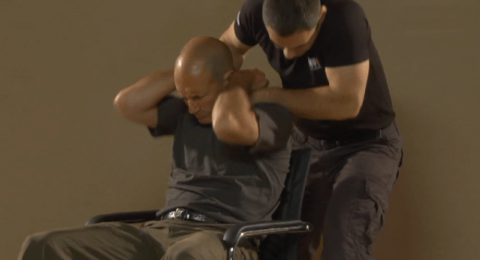
Release from a headlock from behind while in a seated position. The attacker managed to grab you from behind, with a forearm choke. This type of headlock is of course highly dangerous. You need to prevent any pressure to your neck as soon as you can. Pulling the opponents hands down, turning your chin towards your shoulder, turning your body, creating a bigger opening, all these are the basic principles that we have been using in the standing position. Meaning, in releasing from a headlock from behind in the standing position. Here, while seated, you should be pulling the hand of the opponent, while turning and getting up. Parallel to the release, you’re also getting up. Sort of simultaneous and integrated actions.
The way of getting up is getting up while turning. Pressing your body, your head, your shoulder also towards the opponent. This type of screw action, directed diagonally backwards, enables you to push the opponent, to push your neck upwards, out of the grab, to pull his hands down, so the forearm is pressing your neck anymore, and then as your chin is tucked towards your shoulder, get the head out freeing yourself from the grip. The first counterattack is in the standing position, also you are already standing, will be a knee kick. However, if you are out of balance, if it isn’t possible to give a knee kick, release one hand from the grip of the opponent’s hands and start hammering the opponent. Straight punches, regular hammers, any type of attack that will be appropriate is suitable.
Pull the opponent’s palms towards your sternum. This will create a large opening for you to take your head out. Your body turn brings you practically in front of the opponent. The attacker may be choking and pulling you or choking or pressing you down. For us it’s more or less the same. We are applying the release as needed. If you are limited and you cannot get up, then of course you’re going to a finishing and a fighting mode, striking, biting, whatever you can do in order to release yourself and get out from the grab. The chair is not something that really can be considered. It may be entangled between your legs, it may tilt and fall. The main thing is, of course, to be aware of what you’re doing and not trip over it and fall down.
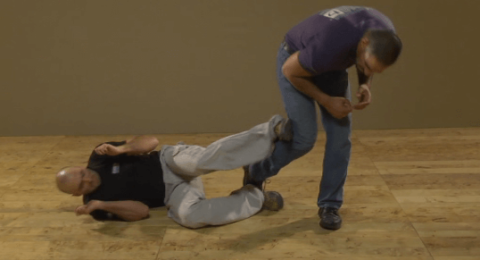
A. Takedowns - Cavalier Leverage on the Wrist Joint
B. Escaping Holds in a Sitting Position (using previous principles and techniques)
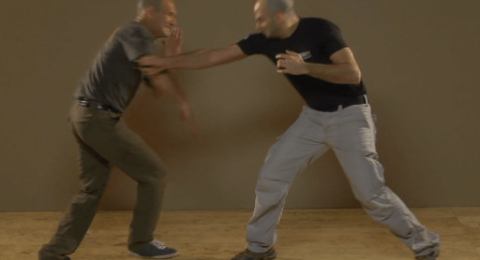
C. Defending an Attempt to Throw (attacker coming from front or side)
E. Defense Against Knife Attacks from Various Angles
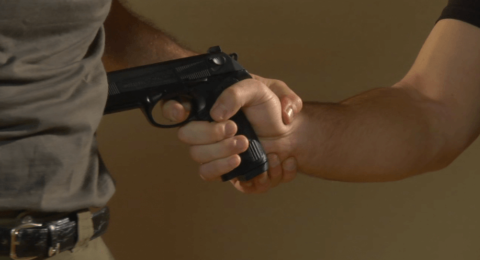
F. Defense Against Handgun Threats
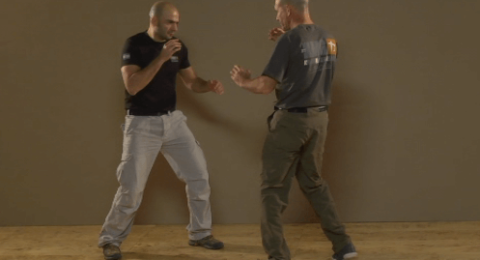
Attacker launches a second attack during counteractions that the defender is doing against the first.
I. Overcoming Disorientation Caused by an Attack (groggy)
Problem: Defender suffering pain and/or concussion resulting in inability to breath or function, the defender's tendency is to remain in standup fighting.
Solution: Fall sideways, softly to the ground, with legs toward the opponent, counterattack.
Advantage: Taking the initiative recuperates; improving position.
Disadvantage: against more than one attacker; problematic terrain
J. Simulations of Real-Life Situations/Scenarios
Dealing with an attacker outside or while seated in a car.