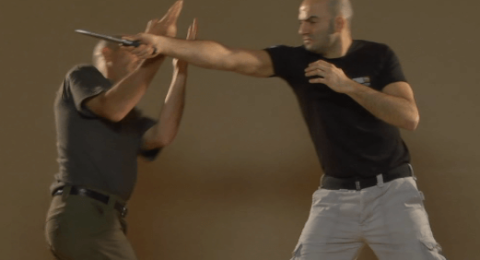
Take down using the wrist leverage, the Cavalier. Here’s an application taking down the knife attacker after the counterattacks…

G3 Training Program
Take down using the wrist leverage, the Cavalier. Here’s an application taking down the knife attacker after the counterattacks…
Video transcript
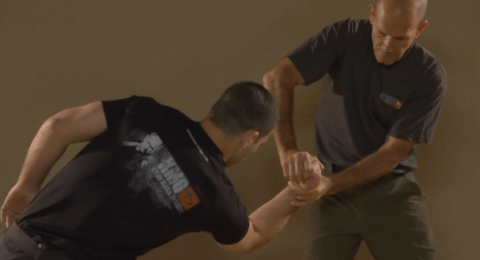
Take down using the wrist leverage, the Cavalier. Here’s an application taking down the knife attacker after the counterattacks. The wrist leverage took the attacker down, and now we are capable to deliver more counterattack and efficiently disarm the attacker. Stepping backwards, while taking the attackers down, using the wrist leverage. As you step back with the parallel hand, you’re grabbing the attacker’s wrist area. With the other hand, the diagonal one, you grab his fist. Step diagonally backwards, bending the wrist, and then pivoting it, sending the palm towards the ground, lifting your elbow and taking the opponent down. You’re applying a strong pull that is taking the opponent off-balance. Naturally, the wrist lock is creating certain level of pain. The beginning is with the bent of the wrist, and then twisting of the wrist. So you are working on a three dimension wrist leverage. Your heel of the hand is pressing against the back of the hand of the opponent. Like this, you can have an efficient and strong bent of his wrist. Keeping constantly a pressure of 90 degrees of a straight angle with your hand and forearm on the opponent’s back of the hand and palm, creates a strong pressure, eventually slamming the opponent towards the ground.
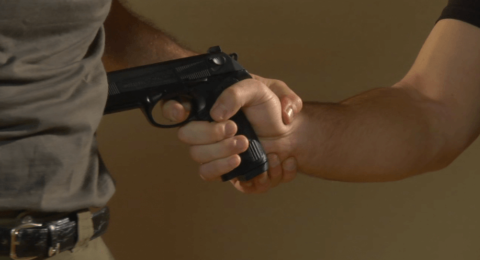
With the hand that you grab the opponent’s forearm, you must not disturb the bending of the wrist. Meaning, many times if the grab is relatively high on the wrist, your index finger will not be grabbing but will be loose. So you apply grab with the thumb and the rest of the three fingers. The moment the attacker is slammed to the ground, straighten yourself with a small circle of action with your hands. This forces the opponent’s body to make a bit of a circle on the ground, aligning him in a straight line, lying in front of you.
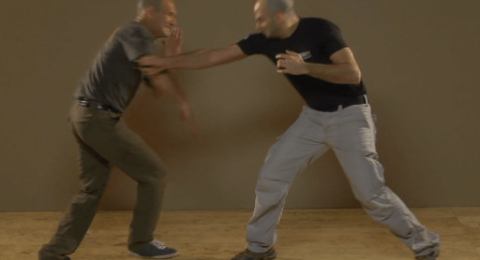
The wrist leverage, the Cavalier, while advancing forward. The main use of it is if you try to do the first wrist leverage, pulling and taking down the opponent, he resisted and pulled. In this case, change your direction and move diagonally forward to take him down towards his back. Practically, as a response to the opponent’s pull, you are advancing strongly forward while applying a wrist leverage that pushes the opponent backwards and slams him on his back. This leverage is a two dimension leverage, meaning, just bending the wrist. However, while you bend the wrist, you are pushing it by the side of the opponent’s shoulder, keeping his elbow low and directing the pressure towards the ground while advancing strongly by the side of the opponent. Be careful so you do not find yourself in front of the opponent’s legs. Go by his side.
The basic of this wrist leverage is the same as before. Meaning, with the hand in front, you grab the wrist. The cross hand, the diagonal one, meaning right, grabs the right. You are bending strongly his wrist, keeping a firm grip and pressing 90 degrees towards the bent palm all the time. For this you have to lift your elbow and press directly at a straight angle, keeping the 90 degrees between your forearm and the opponent’s back of the hand. Here, you can see this technique as a response towards the opponent’s resistance or pull. However, generally speaking, and many times you can apply this lock just as it is, meaning, starting with pushing the opponent’s hand and wrist while bending it towards the side of his shoulder and down towards the ground.
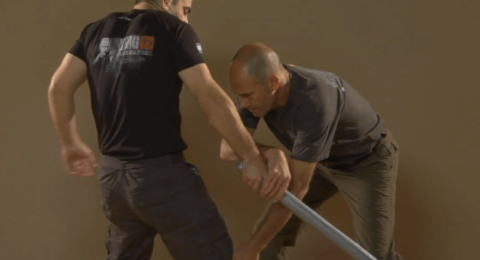
The wrist leverage in a take down, using the elbow strike. As you pull the opponent’s hand and move diagonally backwards, you strike with your elbow in the area of the forearm that’s close to it on the attacker’s back of the hand. And with continuous pressure directed towards the ground, you apply this wrist leverage and take him down. As before, you grab the wrist area and the forearm of the opponent. The grip itself should not be disturbing the bent of the wrist. Meaning, many times your index finger should be loose. The strike with the part below the elbow is hitting the opponent’s back of the hand in 90 degrees. Following with continuous pressure, you are directing this pressure towards the ground, keeping, bending, and twisting the opponent’s wrist. This technique is mainly used when you cannot grab the opponent’s wrist, meaning, your hand is either busy grabbing something or maybe your palms and fingers are injured. A technique like this will disarm the opponent from what he holds in his hand. Meaning, the strike and the pressure will open the opponent’s palm. Whatever he has in his hand will be dropped.
Pay attention that the strike and the pressure that you apply on the opponent’s back of the hand keeps an angle of 90 degrees with it and it doesn’t slides off. This mechanism of wrist leverage is the pull-push mechanism, meaning, with the hand that you grab his wrist and forearm area you’re pulling, while with the elbow and forearm, you are striking and pushing. Practically, it has the same effect as the first leverage, the first Cavalier. Pay attention that the strike creates the first bend and the constant pressure afterwards is keeping the wrist bent, pressed, and it is turning it in a manner that the pressure is directed eventually towards the ground. So the all infrastructure of the wrist lock is taking the opponent down. In the end, you should straighten your back, make a small circle with your hand, so the opponent will be brought in a straight line in front of you and between your legs.
The wrist leverage with an elbow strike, moving forward. Whether the opponent pulled his hand or you decided to move diagonally forward, it is possible to apply this wrist leverage also with an elbow strike. The forearm pressure on the opponent’s back of the hand is done with a palm grips. Here too, we are bending the wrists of the opponent, keeping strong pressure on it, sending the wrist area, the palm area of the opponent by the side of his shoulder, keeping his elbow low, and pressing it, meaning his whole arm, towards the ground. This sort of lock is practically applied on the wrist, as well as on the elbow and the shoulder, is putting and slamming the opponent towards the ground. As you advance forward, be careful to pass by the side of the opponent so your groin area will not be in front of his kick, in front of his legs. Pay attention that you keep the same principles as before. Meaning, the way you grab the opponent’s forearm, the wrist, what is your index finger is doing, the pressure of 90 degrees on the opponent’s back of the hand, constantly bending and pressing the wrist of the opponent.
A. Takedowns - Cavalier Leverage on the Wrist Joint
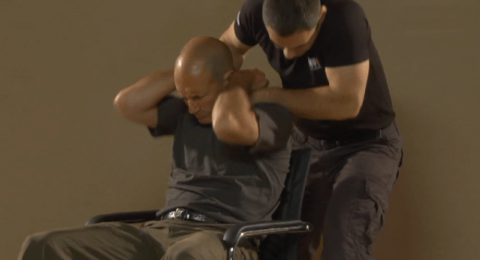
B. Escaping Holds in a Sitting Position (using previous principles and techniques)
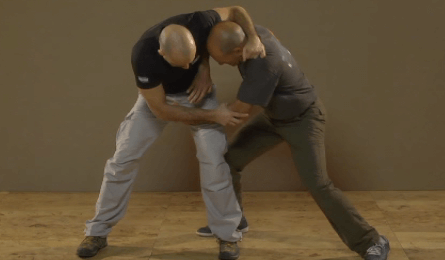
C. Defending an Attempt to Throw (attacker coming from front or side)
E. Defense Against Knife Attacks from Various Angles
F. Defense Against Handgun Threats
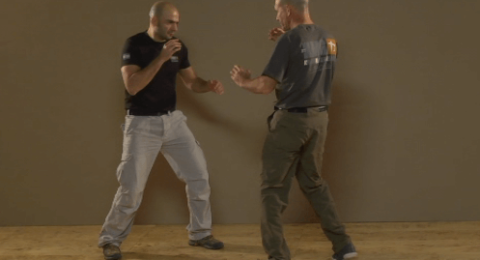
Attacker launches a second attack during counteractions that the defender is doing against the first.
I. Overcoming Disorientation Caused by an Attack (groggy)
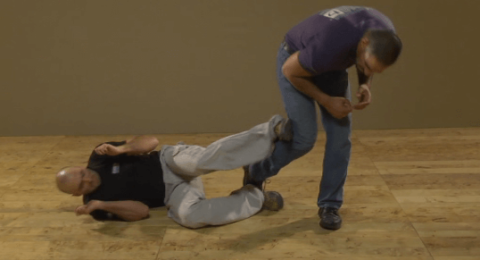
Problem: Defender suffering pain and/or concussion resulting in inability to breath or function, the defender's tendency is to remain in standup fighting.
Solution: Fall sideways, softly to the ground, with legs toward the opponent, counterattack.
Advantage: Taking the initiative recuperates; improving position.
Disadvantage: against more than one attacker; problematic terrain
J. Simulations of Real-Life Situations/Scenarios
Dealing with an attacker outside or while seated in a car.