Dealing with two hands shoulder grab, as usual the first thing we should practice is the preventive measures. The first example is, …

G2 Training Program
Dealing with two hands shoulder grab, as usual the first thing we should practice is the preventive measures. The first example is, …
Video transcript
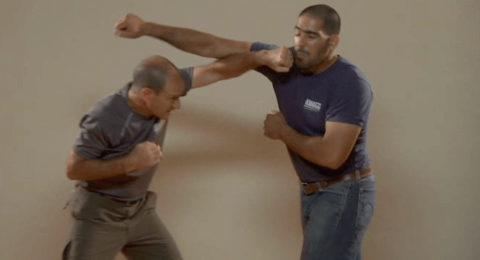
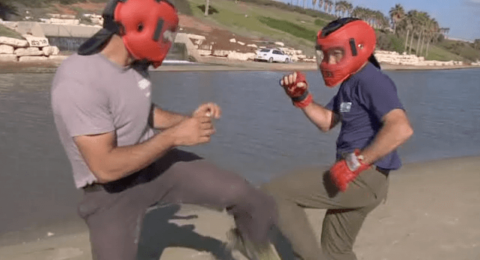
Dealing with two hands shoulder grab, as usual the first thing we should practice is the preventive measures. The first example is, defend the attempt to get grabbed. Of course if you can see an aggressive attacker from a distance you should do preemptive attacks. At a shorter distance, the best is of course defending and counterattacking. Here we assume the situation is not so dangerous, so the solution is defend the attacker’s attempt and moving away from the danger zone, or control the opponent and push him away from you. In these cases it is more suitable to continue with talking, warning, ordering the opponent. Attack the opponent if you see that this is the needed thing to do. Dealing with the grab in an attack, the grab itself is not dangerous, however, the attacker is trying to give a head-butt or any other optional attack, send two hands to deal with the head-butt.
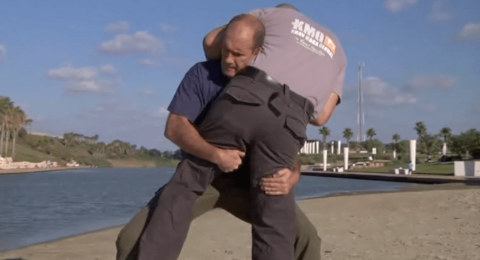
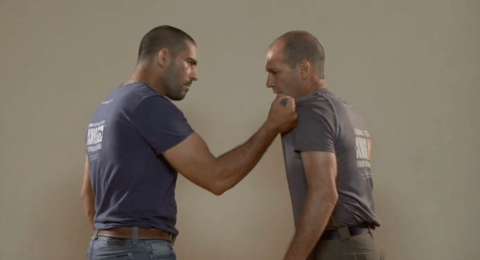
It’s a natural response, sending two hands to defend yourself. You send two hands, usually overlapping palms to meet the attack, to do some sort of a block. If you’re more surprised you may be even leaning backwards, if you’re less surprised, prevent the attack at its earliest stage. Continue with counterattack such as knees, punches, or as needed. Dealing with a shirt grab, retreating and putting the elbow inward, here, after the elbow is in, protecting ourselves and the body is turned so you’re not a wide target in front of your opponent. You need to evaluate and judge what to do. Is it a dangerous situation or not? If it is dangerous situation like we show here, the first response after putting the elbow as protection, is to strike or kick. The immediate strike is naturally according to distance, either an elbow strike sideways or a hammer punch sideways. After the first counterattack continue, for example it can be grab the opponent and deliver a couple of knee kicks.
Obviously you should respond according to the situation and the level of danger. Move away and insert the elbow, do not insert the elbow too much, it still should be more or less just after the face or the side of the head of the opponent. If you put the elbow too low or too inward, your head becomes exposed again. This technique definitely requires a body torque, a pivot and a retreat away. Here in the dry drill we can see the retreat while inserting the arm in. When you insert the arm the palm should be very close to you, the level of the elbow should be at the level of the face of the opponent. Inserting the elbow like this can be even a strike to the opponent who’s trying to trying to head-butt you. Insert the elbow just a bit past the target and then continue. Here we assume the situation is dangerous so continue with counterattacks, meaning the first counter is a hammer punch sideways.
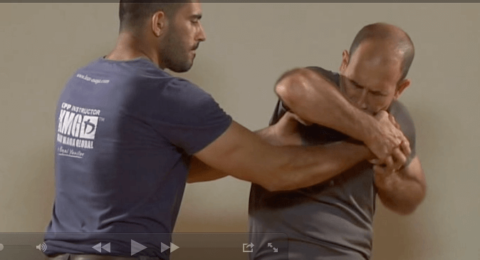
A release from a two hand shoulder grab with a leverage on the attacker’s wrist, as in the previous technique, you move away and insert your arm between you and the opponent. Evaluating the situation, you understand it is not a real dangerous one, so it maybe an option to do much more of a solution which does not break the opponent. The best option is to create a wrist on the opponent’s hand. In a non-dangerous situation it is obvious we can do a soft solution, with both palms you grab the opponent’s fist, your elbow of the front hand should still be high to protect yourself. The string clamping on the opponent’s hand enables you to return with rotating of the opponent’s fist. Return and reach a frontal position while rotating the fist of the opponent, bring the pinky side up. His wrist is bent for about 90 degrees. In most cases his elbow is also bent about 90 degrees. Now rotate the fist and send it downwards towards the opponent’s stomach area.
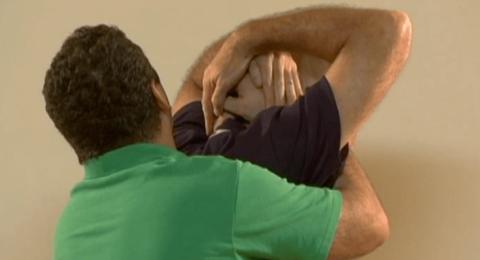
This create a strong and painful lock on the opponent’s wrist. He’s going down because of this. He’s lowering himself to escape the pain. Push the opponent away, release yourself from the grab, the hand is no longer holding your shirt. The essence of this technique is move backwards and return forward. Moving backwards we straighten the opponent’s hand and we can grab and rotate it, returning forward enables a strong lock on the opponent’s wrist. Returning parallel to the opponent, the retreating leg came forward but still remains behind the front leg. Creating a strong lock needs stabilization of the wrist and turning it. Stabilize the opponent’s hand on your chest area. Usually the index finger of the opponent is pressed against the upper part of your chest, in the area between your two collar bones. Leaning forward and down, sort of crunching, enables you to deliver a very strong lock on the opponent’s wrist. That’s right, to be able to create a strong lock, your two hands should be pressing like a clamp, very strongly, the opponent’s fist between them.
A. Spinning Attacks, Strikes and Kicks

C. Sliding Defense Against a Straight Punch
Notes: Both defenses are done with the front hand against the opposite hand (i.e. - left vs. right).
D. Double Hand Defense Against Kicks of an Unknown Height

E. Defense Against One-Handed Shirt Grabs
F. Escaping From Two-Handed Shirt Grabs
H. Defending Against Knife Attacks - Straight Stabs
Note: Practice techniques 1 and 4 from a passive stance. Start practicing techniques 2 and 3 from an appropriate ready stance. In the later stages, practice from a minimized ready stance. All without returning to the initial channel of attack
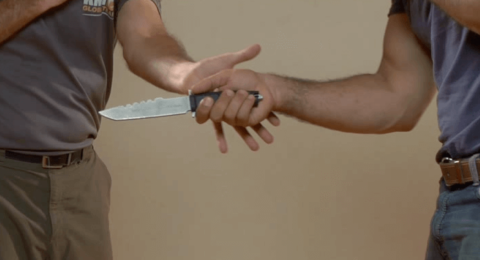
I. Defense Against Slashing Knife Attacks
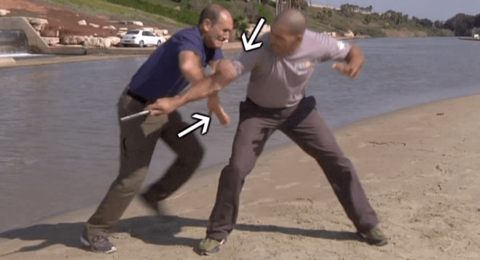
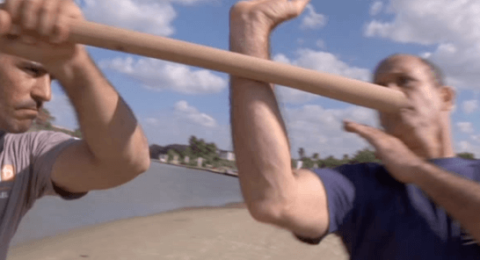
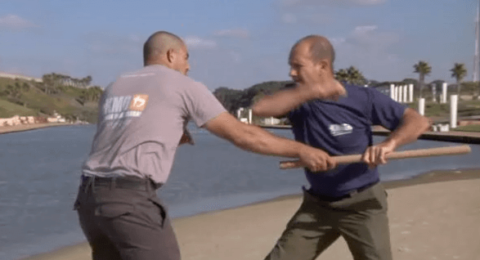
J. Defending Against a Straight Stab or Thrust with a Stick
K. Dealing with a Continuing Attacker – Whilst Defending Against Different Kicks
Note: see G-1 for more information about protective and safety gear.
1. Escaping a One-Handed Shirt Grab